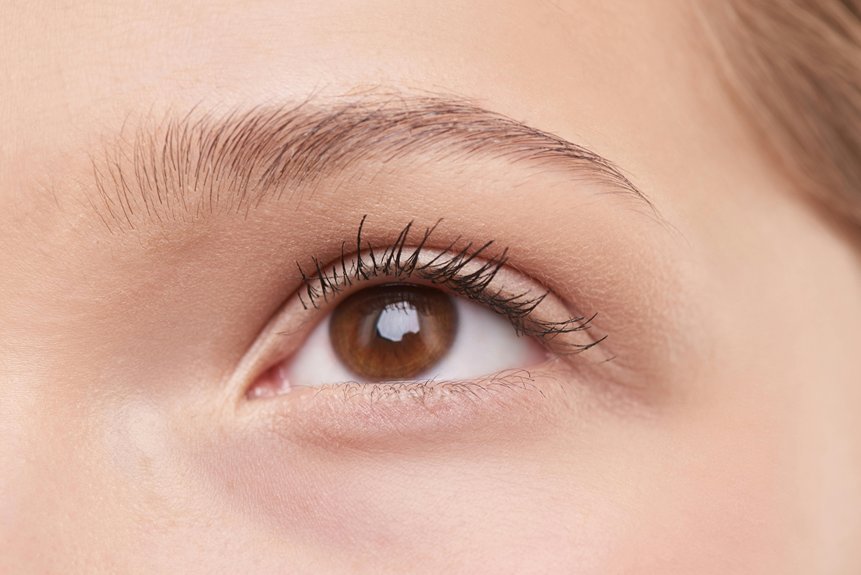
You can map your eye shape in minutes with a mirror, good lighting, and a smudge-proof liner. Trace the visible lid, note how much crease shows, and check if outer corners tilt up or down. Measure lid space, socket depth, and iris visibility to separate almond, round, monolid, hooded, deep-set, upturned, and downturned. From there, liner angles, shadow placement, and lash styles lock in. Want exact tests and tailored techniques next?
Key Takeaways
- Face a mirror and map your visible lid outline and crease with a smudge-proof marker to see lid space and symmetry.
- Check how much mobile lid shows with eyes open; minimal lid suggests hooded, broad flat plane suggests monolid.
- Observe outer-corner tilt; higher outer corner indicates upturned, lower indicates downturned, level suggests almond or round.
- Assess iris visibility; more white above/below iris suggests round, tapered corners with visible crease suggest almond.
- Note dominant features and apply techniques accordingly: tightline for hooded/monolid, outward-thickening liner for round, soft upswept wings for almond/downturned.
Why Eye Shape Matters for Makeup
Although trends shift, eye shape dictates how product placement reads on the face. You need strategies that respect lid space, crease depth, and orbital bone structure. When you understand the importance of eye shape, you calibrate makeup application to enhance symmetry, lift, and proportion rather than fight anatomy.
You’ll choose liner thickness based on visible lid area, angle shadow to correct descent or width, and position shimmer to project or recede planes. Mascara and lash mapping change with inner–outer corner balance and lash line curvature.
Highlight sits on the brow bone where it supports lift; contour hugs the socket only where volume allows. Brushes, pressure, and blend radius adjust to mobility of skin. This precision optimizes wear, prevents transfer, and produces intentional, polished results.
Quick At-Home Tests to Determine Your Eye Shape

You’ll start with a Mirror-and-Marker check: face forward, relax your gaze, and trace your visible lid outline to gauge lid space and symmetry.
Next, perform a Crease Visibility test by looking straight ahead to see if your crease is fully visible, partially obscured, or hidden when your eyes are open.
Finish with an Outer-Corner Tilt assessment by aligning a brush from the nostril to the outer corner to determine if your eye line tilts up, down, or stays neutral.
Mirror-And-Marker Check
Mirror in hand, run two quick tests to map your eye shape with precision.
Start with correct mirror placement: stand at arm’s length, eye level, bright frontal light. Keep your face neutral. Note the outer corner’s angle relative to the inner corner and the visible lid surface.
Now use the marker method.
Choose smudge-proof, skin-safe marker types: brow pencil, white eyeliner, or cosmetic mapping pen. With a steady gaze, dot the true outer corner, the highest point of the upper lid, and the lowest point of the lower rim.
Connect dots with light strokes to outline your natural contour. Compare left and right for symmetry. Photograph the marks straight on.
Clean gently, then record observations to guide liner wings, shadow placement, and lash emphasis.
Crease Visibility Test
With your contour marks photographed and notes in hand, confirm how much of your mobile lid shows when your eyes look straight ahead.
Sit in bright, even lighting, hold a neutral gaze, and observe whether the natural crease is visible, partially hidden, or fully obscured by the upper lid. Note asymmetry and any crease shape variations (rounded, slanted, segmented).
- Stand one arm’s length from the mirror; relax your brows to avoid lifting the crease artificially.
- Blink, reset, and record visibility: full lid, half lid, or minimal lid exposure.
- Mark a floating crease with a nude pencil if the fold disappears.
From your results, choose crease enhancement techniques: raise the shift shade above the natural fold for hidden creases, define the socket line for visible creases, or map a soft “false” crease for partial visibility.
Outer-Corner Tilt Assessment
Curious whether your outer corners tilt up, down, or sit neutral? Stand facing natural light, keep your head level, and relax your brows.
Hold a straight edge from the inner corner through the pupil to the outer canthus. Compare the outer corner characteristics to the guideline: if the canthus sits above it, you’re upturned; below, downturned; aligned, neutral.
Confirm with a selfie: look straight ahead, no smile, camera at eye height.
Draw a digital line from inner to outer corner to verify the angle. Note the tilt impact on liner and shadow placement: upturned eyes tolerate lifted wings; downturned benefit from micro-lifted flicks and shadow that hugs the upper outer third; neutral eyes suit balanced wings.
Record findings for consistent application.
Identifying Almond, Round, and Monolid Eyes
Before you reach for eyeliner, learn to distinguish almond, round, and monolid eyes so your techniques match your anatomy. Assess the visible iris with eyes relaxed, facing a mirror under even light. Note crease structure, outer-corner taper, and lid platform.
- Almond: Classic almond eye characteristics include a visible crease, tapered inner/outer corners, and an iris slightly covered by upper and lower lids. This shape supports elongating liner and gradient shading.
- Round: Round eye features show more exposed sclera above or below the iris, a circular aperture, and a balanced lid platform. Use lateral extension to reduce circularity.
- Monolid: Minimal or absent crease with a broad, smooth lid plane and a subtle epicanthic fold. Prioritize tightlining, lifted outer diffusion, and thin, precise liner placement.
Spotting Hooded, Deep-Set, Upturned, and Downturned Eyes
First, assess for hooded lids: with eyes open, if the mobile lid is mostly obscured by the upper fold and the crease sits deep, you have hooding.
Next, determine tilt by comparing outer and inner corners—if the outer corner sits higher, it’s upturned; lower indicates downturned.
Note this baseline to guide liner placement, lift techniques, and shadow mapping.
Identifying Hooded Lids
Wondering if your lids are hooded or simply deep-set? Assess your crease with relaxed eyes facing a mirror. If upper skin folds over the crease and partly veils the mobile lid, you’re seeing hooded lid characteristics. The brow bone may appear more prominent, and liner easily transfers because lid space is limited when eyes are open.
Use targeted, efficient techniques. Prioritize lift, visibility, and longevity with makeup tips hooded. Map product placement with eyes open so color reads correctly.
- Place matte shift shade slightly above the natural crease to create a faux crease; keep shimmers on the center for reflection without bulk.
- Tightline and use thin, upward-angled liner; avoid thick bands that disappear.
- Curl thoroughly, apply waterproof mascara, and anchor with transfer-resistant primer and setting.
Upturned vs. Downturned
Although lid structure varies, determining upturned vs. downturned eyes starts with your outer corner baseline.
Hold a straight tool from inner to outer canthus; assess where the outer corner sits relative to this horizontal line.
If the outer corner tilts above the line, you exhibit upturned features. Your lower lash line appears more elevated, and the outer third naturally lifts.
For balance, diffuse liner slightly downward at the tail, keep outer-shadow placement soft, and anchor with a tightline to avoid over-lift.
If the outer corner drops below the line, you show downturned characteristics. The upper lid’s outer third angles downward.
Correct by lifting eyeshadow from the outer corner toward the temple, flicking liner subtly upward, and concentrating curl and mascara on outer lashes to counter descent.
Eyeliner, Shadow Placement, and Lash Picks by Eye Shape

Because each eye shape reflects light and space differently, align your liner, shadow placement, and lash style to its structure for balanced definition.
Use eyeliner techniques that respect lid visibility, crease depth, and outer-corner angle; refine shadow choices to control contour, lift, and proportion; select lashes that reinforce direction without overwhelming the orbital shape.
- Monolid/hooded: Tightline, micro-flick slightly upward; keep mattes above the crease line to fake height; anchor outer third with deep tones. Choose segmented or half lashes to lift without bulk.
- Round: Elongate with a thin inner line that thickens outward; place mid-tone diagonally; keep depth on the outer V. Opt for wispy, tapered lashes that extend at the ends.
- Almond/downturned: Extend liner subtly past the outer corner with a gentle upsweep; shade above crease for lift; concentrate shimmer center-lid. Use cat-eye or outer-accent lashes.
Common Mixes and How to Customize Techniques
You rarely meet a pure eye shape, so build on the liner, shadow, and lash fundamentals by prioritizing the dominant feature and tempering the secondary.
If you’re hooded-round, lift first: keep liner ultra-thin through the inner third, tightline, then extend a short, upward wing; diffuse a mid-tone just above the crease to fake depth, and anchor with tapered outer lashes.
Almond-downturned? Keep symmetry: angle shadow and wing 10–15 degrees upward, avoid droop past the outer corner, and use half lashes placed high.
Monolid-close-set? Create lateral width: concentrate shimmer and depth on the outer third, float a soft faux crease, and elongate liner horizontally.
Deep-set-protruding? Matte the lid, highlight the orbital shelf subtly.
These custom techniques refine any mixed eye shape and photograph clean.
Conclusion
You’ve mapped your lids, assessed creases, and noted outer-corner tilt—now apply it. Use targeted liner angles, strategic shadow placement, and calibrated lash density to balance proportions and emphasize your iris. Prioritize symmetry, blend only where structure supports it, and document what photographs well. When shapes mix, customize: adjust depth, lift, or width with micro-corrections. Re-test in natural light, refine tools, and practice. With consistent technique and precise adjustments, you’ll execute polished, flattering looks every time.

