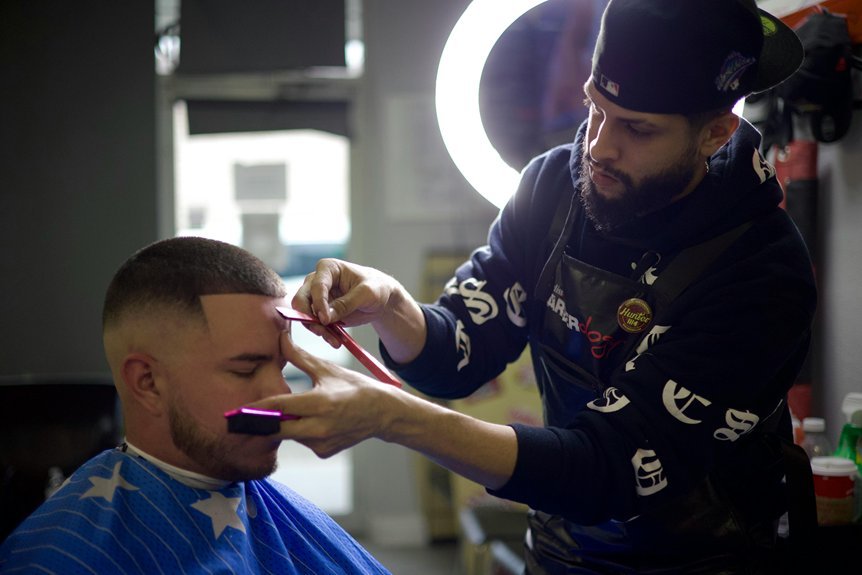
You want a low taper fade that’s clean, modern, and built to last. Start by knowing where the taper starts—just above the ear and nape—then control contrast with lever positions, guard progression, and soft C-strokes. Use half guards for precision, clipper-over-comb to refine bulk, and thinning shears to melt lines. Pair it with the right edge-up and a trim schedule. Get the terminology right before you sit in the chair, because the next step determines everything.
Key Takeaways
- Map a low taper starting just above the ear and nape; define clear guidelines before cutting to keep the taper compact and symmetrical.
- Create the initial bald or near-skin zone, then step lever open and guards up gradually (#0.5, #1, #1.5, #2) for a smooth gradient.
- Erase lines with half guards and micro-lever taps, using soft C-strokes and floating off the head to avoid over-lightening.
- Refine blends with clipper-over-comb and thinning shears; cross-check with reverse grain passes for a seamless finish.
- Maintain sharpness with cleanups every 10–14 days, daily brushing, light matte products, and precise edge detailing every few days.
What Is a Low Taper Fade?
Although barbers toss the term around a lot, a low taper fade is a precise haircut that tapers the hair from the temple and nape down to skin or near-skin, with the fade starting low—at or just above the ear and along the neckline.
In strict fade definition terms, you’re creating a seamless gradient: longer lengths on top, progressively shorter guards through the sideburns and occipital area, terminating in clean, tight edges.
You’ll keep weight above the parietal ridge while compressing bulk at the perimeter. This approach preserves shape, enhances flow, and frames the face without exposing too much scalp.
Among taper styles, the low taper emphasizes subtlety and polish. Expect crisp outlines, minimal demarcation, and a controlled silhouette that pairs with textured crops, quiffs, or curls.
Low Taper vs. Mid and High Tapers
You’ll compare taper height—low sits near the ears and nape, mid rises to the temple, high pushes into the crown—to see how each reshapes your head’s silhouette.
Match that height to your face shape: low softens longer faces, mid balances oval and round, high sharpens square jaws.
Consider upkeep and styling: low needs subtle detailing and blends well with classic texture, while mid and high demand tighter lineups and more frequent fades for a crisp, fashion-forward edge.
Taper Height Differences
While all tapers clean up the edges and graduate length, the key difference is where the fade begins and how much scalp exposure you show. You’re choosing taper height and fade levels, not just a “shorter sides” look.
A low taper initiates just above the ear and nape, keeping bulk higher and revealing minimal scalp—clean, discreet, and office-proof. A mid taper starts around the temple and mid-occipital, removing more weight and showing moderate scalp for a bolder outline. A high taper rides above the temple line, compressing the blend zone and maximizing contrast with clear scalp reveal.
Technically, lower fades mean longer blending zones and softer gradients; higher fades shorten the blend, increase contrast, and require tighter guard control, sharper clipper-over-comb, and precise clipper-to-trimmer debulking.
Face Shape Suitability
Curious which taper height flatters your face most? Start with face shape analysis, then layer in hair type compatibility. If you’ve got an oval face, a low taper preserves balanced proportions and reads refined; mid and high tapers add edge without skewing symmetry. Round faces benefit from higher taper heights to elongate; square jaws look razor-sharp with low or mid to keep weight at the temples. Heart shapes favor low tapers to avoid top-heaviness; diamond faces welcome mid/high to soften width at the cheekbones.
| Feeling | Taper Height | Visual Impact |
|---|---|---|
| — | — | — |
| Confident | Low | Clean frame, subtle lift |
| Bold | Mid | Sharper outline, leaner cheeks |
| Fearless | High | Maximum contrast, taller silhouette |
Coarse curls handle higher tapers cleanly; fine, straight hair excels with a low taper’s controlled graduation.
Maintenance and Styling
With your face shape mapped, maintenance and styling set the cut apart day to day. A low taper demands tighter upkeep than a mid, but less exposure than a high.
Book a cleanup every 2–3 weeks to keep the neckline crisp and the temple fade seamless. At home, brush daily to lay growth patterns, then refine with lightweight hair products: matte clay for texture, cream for control, or salt spray for airy lift.
Use precise styling techniques. Blow-dry on medium heat, directing sides downward to preserve the taper’s shadow. Keep bulk on top; avoid over-thinning edges.
For curls, diffuse low, then seal with gel. For straight hair, pre-style with mousse, finish with paste. Mid and high tapers tolerate mess; a low rewards clean lines.
Face Shapes and Hair Types That Suit It
You’ll get the cleanest result when you match the low taper’s contour to your face shape—soften round faces, sharpen oval and diamond, and balance square or heart.
Prioritize hair textures that hold structure: straight to wavy hair yields crisp gradients, while coily or thick hair delivers bolder contrast with tighter tapering.
If your hair is fine, keep the taper low and minimal to preserve density and avoid exposing scalp.
Matching Face Shapes
So which face shapes actually excel with a low taper fade? You do. The cut’s low graduation sharpens proportions without overexposing the sides, so it flatters most geometries.
For round faces, keep the taper clean and the top structured to add height and edge.
Oval faces are versatile—maintain balanced length and a soft neckline.
Square faces already have angular features; a crisp taper enhances jaw definition without bulking the temples.
Heart shapes benefit from weight at the crown and a gentle, low shift to balance a narrower chin.
Long faces look best with slightly fuller sides to avoid extra elongation.
Diamond shapes gain harmony by softening the widest points.
Triangular faces need controlled volume up top and a subtle, tight taper to refine the jawline.
Best Hair Textures
Three texture categories dominate how a low taper fade performs: straight, wavy, and curly/coily. With straight textures, the fade reads sharp and minimalist—great for square or oval faces. Wavy hair adds movement; the taper debulks the temple and nape while preserving flow on top. Curly textures or tight coils excel because the taper controls side volume, frames cheekbones, and keeps edges crisp without fighting shrinkage.
| Texture | Best Face Shapes | Key Notes |
|---|---|---|
| Straight | Square, oval | Precision lines, low bulk |
| Wavy | Oval, heart | Soft shifts, retained length |
| Curly/Coily | Round, diamond | Volume control, defined outline |
Ask your barber for a low drop at the mastoid, guard 0–1 at the baseline, and scissor-over-comb above the parietal ridge to keep proportion.
Key Terms to Use at the Barber
Curious which terms guarantee the low taper fade you want? Dial in your request with precise barber terminology and fade lingo. Say “low taper, starting at the tragus,” so the blend begins just above the ear and drops behind it.
Specify guard numbers: “open 0 to 1.5 to 3,” or “skin to 1 to 2,” for a clean gradient. Add “natural hairline, no hard line,” to keep edges soft. Ask for “scissor-over-comb on top” if you want texture, or “clipper-over-comb” for tighter control.
- Low taper: blend starts low at the ear/neck, not mid or high
- Debulk with #2 on the sides; leave 1–1.5 inches on top for styling range
- Keep sideburns tapered to zero; neckline tapered, not boxed
Reference Photos and Consultation Tips
Bring two to three clear reference photos that match your hair type, density, and growth patterns, plus angles of the fade and neckline.
Point out specific elements—taper height, gradient softness, temple treatment, sideburn length, and finish (matte vs sheen)—so your barber can calibrate guard choices and blending.
State your lifestyle and styling routine upfront, so the cut’s maintenance and shape align with your goals.
Choosing Ideal References
Why start guessing when precise references can lock in the low taper fade you want? Build a tight set of visuals that match your hair density, curl pattern, and growth lines.
Prioritize reference styles that showcase temple height, taper length, and neckline finish from multiple angles. Pull image inspiration that mirrors lighting and contrast similar to your own hair so clipper guards and adjustment points read clearly.
- Side, back, and 3/4 views highlighting the fade’s lowest point, weight line, and taper cone.
- Close-ups of edges: C-cup, nape outline, and sideburn length to calibrate sharpness.
- Shots on hair types like yours (straight, wavy, coily) to predict blend behavior.
Curate 3–5 consistent examples. Note guard estimates, skin exposure level, and shear-versus-clipper blending so execution stays exact.
Communicating Style Goals
Even before you sit in the chair, frame your ask like a spec sheet: define the taper’s start point at the temple and nape, the lowest fade break, preferred skin exposure, and how tight you want the C-cup and neckline.
Bring two or three reference photos that match your hair density, curl pattern, and head shape. Point to specific elements—guard length at the sides, change width, sideburn finish, and beard blend.
State your style preferences in clear terms: “low taper, mid-skin exposure, guard 2 on sides, scissor trim on top, square neckline.”
Confirm maintenance cadence and styling routine so the cut fits your lifestyle. Ask your barber to restate the plan for goal alignment.
During the cut, request checkpoints at the fade break and neckline for micro-adjustments.
Essential Tools and Guard Sizes
Before you chase clean gradients and razor-sharp edges, lock in the right kit: a quality cordless clipper with adjustable lever, a matching detail trimmer, and sharp shears.
Choose reliable clipper types—taper-blade for smoother blends, fade-blade for tighter skin changes. Keep blades zero-gapped but safe, align them, and oil lightly before each use.
Pick taper blades for smooth blends, fade blades for tight transitions. Zero-gap safely, align, oil before every cut.
Your guard sizes define consistency: #0.5, #1, #1.5, #2, and #3 handle the low zones cleanly, with half guards bridging micro steps. Magnetic or premium snap-on guards track truer.
- Polished metal clipper gliding through the temple shadow.
- A matte-black trimmer etching a crisp neckline arc.
- Transparent guard clicking in, numbers clear, taper lever mid-set.
Use a comb with fine and wide teeth, a neck duster, and disinfectant for pro-level hygiene.
Step-by-Step Guide to the Fade
Although every head shape dictates slight tweaks, the workflow stays consistent: set your baseline, build your fade from the bottom up, then refine.
Begin by mapping the low taper point just above the ear and nape; that’s your guideline in haircut terminology. With clippers closed, clear the perimeter to skin, keeping the taper compact. Open the lever one notch and create your second guideline a finger’s width up.
Apply fade techniques: step up guards sequentially, maintain consistent stroke length, and mirror on both sides.
Switch to a half guard to erase the lower line, using short, scooping passes. With the lever open on your base guard, detail the shift in controlled bursts.
Edge the temple and nape cleanly. Check symmetry in natural light. Stop before over-removing weight.
Blending Techniques for a Seamless Finish
Once you’ve built the basic fade, blend by managing contrast at the changeover zones with deliberate lever control, guard selection, and stroke angles.
Work from dark to light with a soft C-stroke, floating off the head as you rise. Use half-guard steps and micro-lever taps to erase lines without over-lightening. Anchor with the ridge line, then cross-check with reverse grain passes for a seamless alteration.
Work dark to light with soft C-strokes, micro-lever taps, and reverse-grain cross-checks for seamless fades.
- Tight shadow at the nape dissolving into clean, airy temples
- Subtle gradation under natural light with zero visible demarcations
- A crisp perimeter balanced by a satin-soft mid-panel
Refine with clipper-over-comb to marry bulk to the faded panels.
Switch to a 1.5 guard for mid blending, then an open 1 to whisper out remnants. Finish with thinning shears, point cutting, and final cross-checks to validate your blending techniques.
Styling the Top: Waves, Curls, and Texture
Two priorities guide top styling on a low taper fade: defining texture and preserving silhouette. Start by mapping growth patterns, then set a controlled parting line so volume stays balanced over the taper.
For waves, use disciplined wave techniques: brush in consistent angles, apply a light pomade, and compress with a durag to lock pattern without over-darkening the fade.
For curls, layer curl products: a hydrating cream for clump, a gel for hold, and diffuse on low heat to maintain lift. To enhance movement, mist texture sprays at the mid-lengths, then pinch and twist sections for separation.
Select styling tools with intent: a vent brush for airflow, a wide-tooth comb for definition, and a diffuser to protect coil integrity. Finish with matte control to avoid glare.
Edge-Ups and Detailing Around the Hairline
With your top styled and silhouette set, the haircut reads cleanest when the perimeter is engineered with a precise edge-up. Work from the natural recession points, mapping symmetry before you cut. Use trimmers with zero-gap alignment for crisp baselines, then refine with a straight razor to glass off micro-stubble. Keep corners squared unless your temples demand a softer arc; avoid pushing the hairline forward.
- Sharp, ink-like outlines framing a low, seamless taper
- Temple notches balanced to your brow and eye line
- A razor-polished C-curve hugging the beard shift
Apply controlled tension and short, overlapping taps—core edge up techniques for consistent lines. For hairline detailing, shave in the direction of growth to prevent ashiness, then dust talc, recheck shadows under bright light, and correct millimeter deviations.
Maintenance Routine and Trim Schedule
Even after a flawless low taper fade leaves the chair, the clock starts on upkeep. Lock in a maintenance frequency: every 10–14 days for crisp definition, every 7 days if your hair grows quickly or your workplace demands sharpness.
Even after a flawless low taper fade, upkeep starts now—book maintenance every 7–14 days for sharp definition
At home, brush daily with a soft wave brush to align growth and prevent bulk. Cleanse 2–3 times weekly with a sulfate-free shampoo; co-wash in between to retain moisture. Hydrate the fade zone lightly—use a matte moisturizer or lightweight leave-in to avoid sheen distortion.
Between barbershop visits, detail edges every 3–4 days with a trimmer and a handheld mirror.
For product recommendations, stock a matte clay for texture, clear styling gel for flyaways, alcohol-free aftershave for irritation control, and a boar-bristle brush for polish.
Common Mistakes and How to Fix Them
Dialed-in upkeep only works if you avoid the classic errors that blunt a low taper’s shape. The most common pitfalls: pushing the fade too high, skipping lever control, and neglecting weight distribution at the parietal ridge.
Keep the taper low by mapping landmarks—ear top and occipital—before you cut. Use guards in sequence and micro-adjust the lever for clean shifts. If you see bands, apply targeted fade corrections: reopen the lever, recut with a half guard, then detail with corners only.
Preserve line integrity at the temple and nape; edge last, not first.
- Guard progression: 0 open → 0.5 → 1 → 1.5; no jumps.
- Scissor-over-comb to de-bulk without raising the fade.
- Finish with a matte product to reveal shadows and fix residual lines.
Conclusion
You’ve got the blueprint: map your taper low, clear the perimeter to skin, and build clean guidelines with controlled lever work. Blend with half guards, soften contrast with C-strokes, and finesse with clipper-over-comb and thinning shears. Pair it with sharp edge-ups, tailored top styling, and a consistent maintenance schedule. Bring reference photos, speak the right terms, and match the taper to your face shape and hair type. Do it right, and your low taper fade stays crisp, modern, and flawless.


